Successfully Get Root Access On Android 10 (Google Pixle 3 XL) With Magisk
Though Android smartphones become more and more powerful, they are still many users want to have their devices rooted. Since the technology of Android system becomes more developed, it's harder and harder to excavate Android loop. However, Kingoroot team has tried many other tools for rooting. We successfully rooted Google Pixel 3 XL which updated to Android 10 with Magisk. Here to show the detailed tutorial.
Notice: Android 10 can't flash the Magisk via TWRP, because twrp doesn't support Android 10. We get root access with Magisk by flashing the patched of boot.img of Magisk. I will write the tutorial of how to update your Android 9 Pie to Android 10 on Google Pixel 3 XL later.
How to Root Android 10 (Google Pixel 3 XL Android 10 as the example)
Preparation:
- Google Pixel 3XL powered on with Android 10 without root access;
- At least 50% battery level;
- USB Cable (the original one recommended);
- Install the
adbandfastboot. Just download the Google SDK Platform-Tools package for using the adb and fastboot. on your Windows. - Google Pixel3 XL official package - "crosshatch". Download URL: https://developers.google.com/android/images#crosshatch
- Magisk Package. Download URL: https://magiskmanager.com/
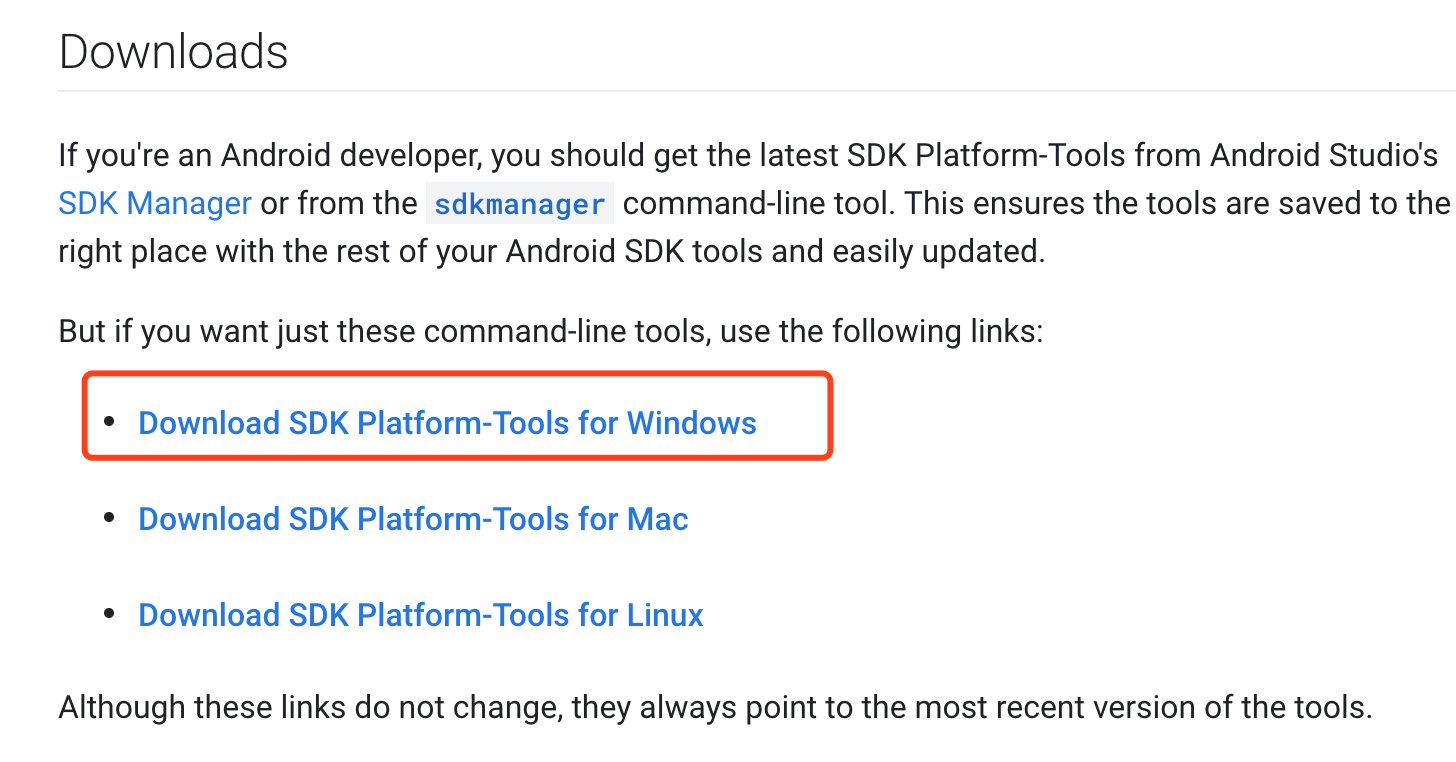
The Platform-Tools download websites: https://developer.android.com/studio/releases/platform-tools
Step by Step to Root Your Android 10 with Magisk
Step 1: Plug your Android device into your computer via USB cable.
Step 2: Enable USB Debugging mode on your android device.
USB Debugging mode enabled is a necessary step of Android rooting process.
Step 3: Put the Android 10 package "crosshatch" into a file and unzip it. For example: .../google/crosshatch-qq3a.200605.002.a1-factory-7e05d486.zip to get the file: .../google/crosshatch-qq3a.200605.002.a1/...
Step 4: Put the downloaded "platform-tools" zip to the "crosshatch" unzipped file to merge to one file.
Step 5: Unzip the Platform-Tools package you download and then press "Shift" and click the right mouse, select " Open the command line here". Or just input the "cmd" in the top address bar the press the "Enter".
You will get the "cmd" window. All the following "adb" commands and fastboot commands are entered under the DOS interface.
- Check your device whether it connects to network by input the following command in under the DOS interface:
adb devicesCheck your USB and debugging if your device can't connect to network.
- Turn the device to bootloader mode:
adb reboot bootload![]()
Start to Root.
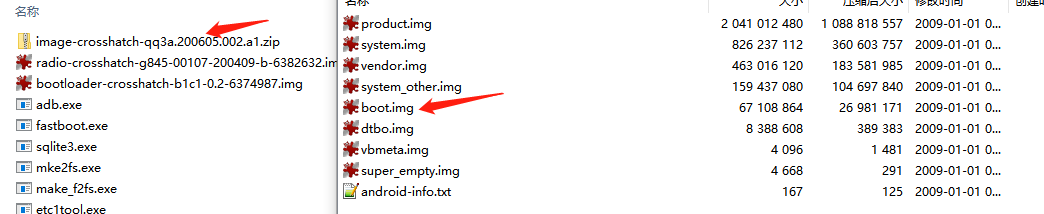
Step 6: Get the boot.img from the zip file image-crosshatch-qq3a.200605.002.a1.zip
Put the boot.img into your mobile category: /sdcard/download/category or use the adb command:
adb push xxx/google/.../boot.img / /sdcard/Download/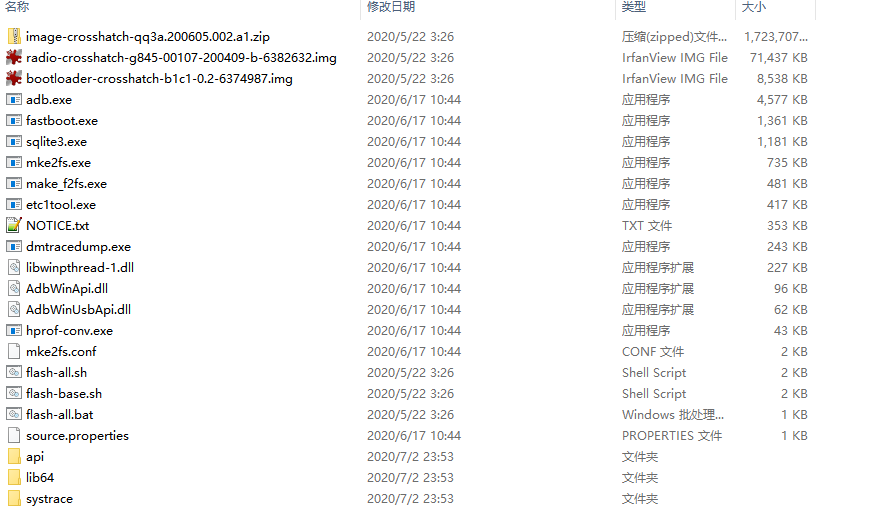
Step 7: Install the MagiskManager apk, put it in the "sdcard" file.
Step 8: Open the MagiskManager, and update to the latest version.
Step 9: Select “Install” - “Select and Patch a file" - Select "boot.img" in the "/sdcard/Download/" file.
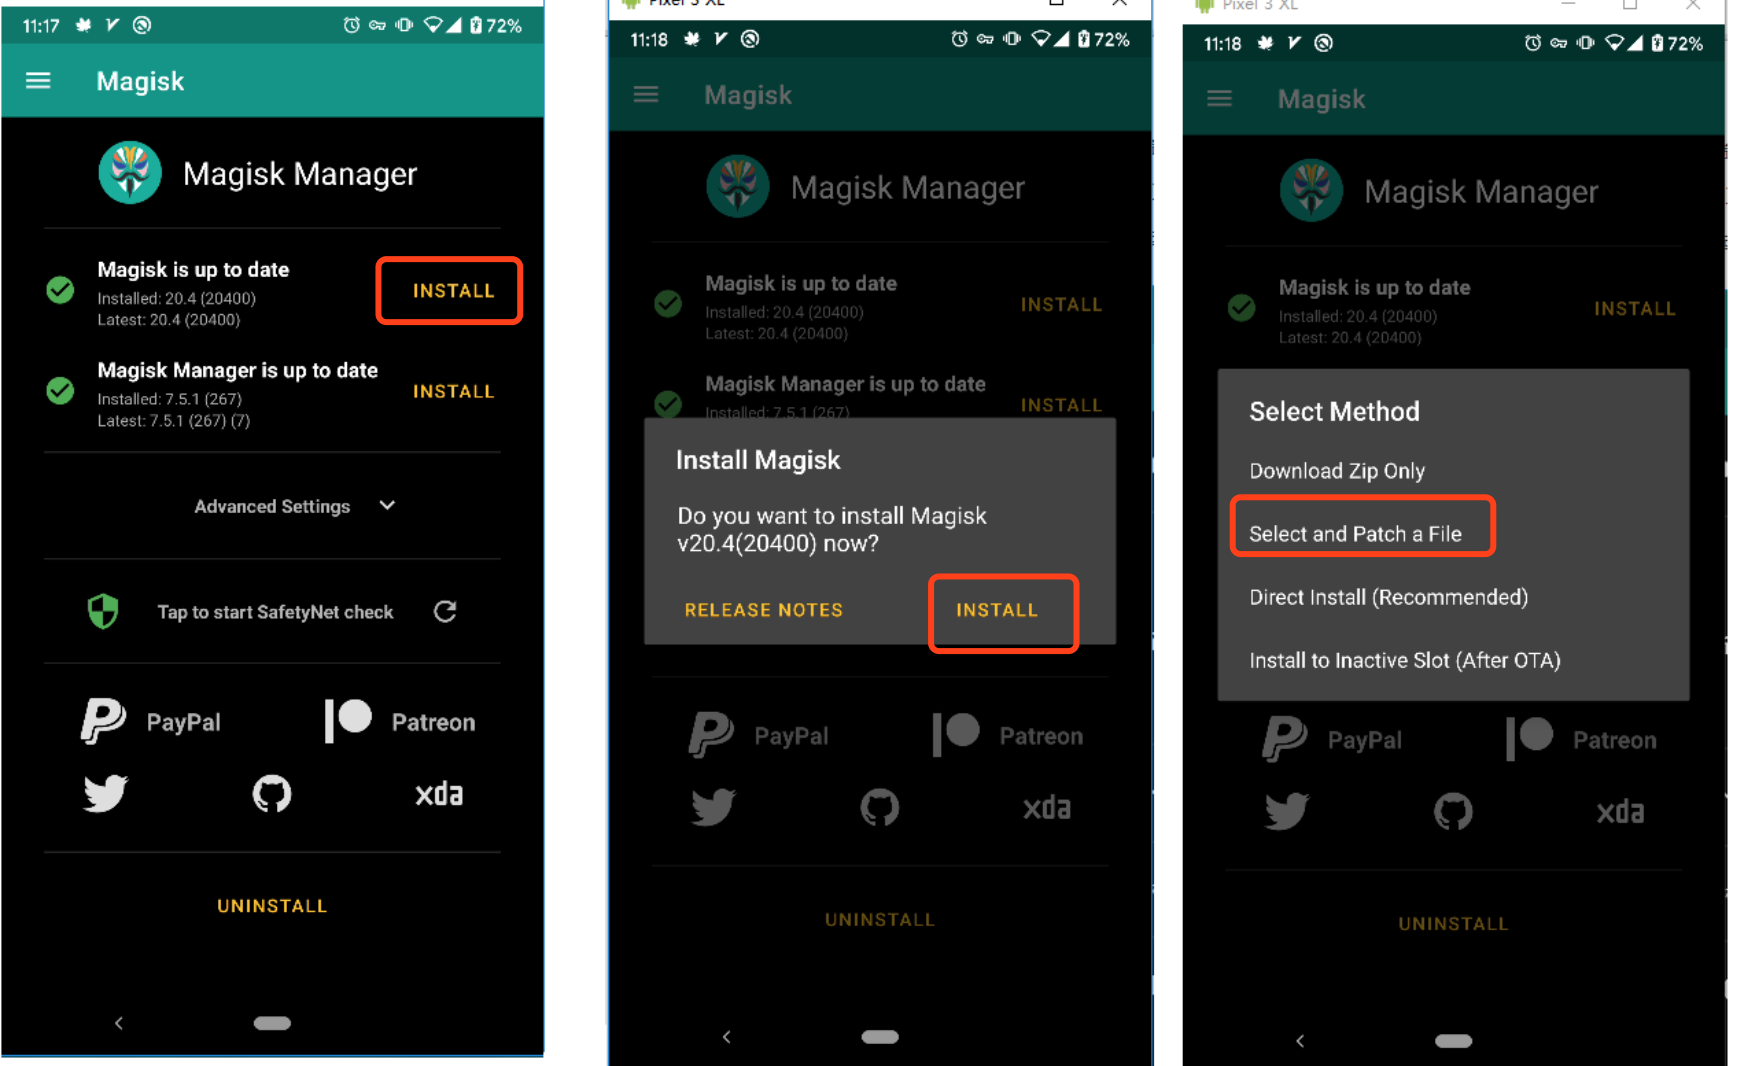
Waiting the Magisk patch the file completely. There will be a new file named "magisk_patched.img", and put this new patched file to the merged file in step 4, the same file with boot.img.
Step 10: Turn to the bootloader mode:
adb reboot bootloader
Step 11: Check the current partition of your mobile.
fastboot getvar current-slot
Wait the DOS return the result: "a" or "b".
Step 12: Flash the patched "magisk_patched.img"
fastboot flash boot_a magisk_patched.img
orfastboot flash boot_b magisk_patched.img
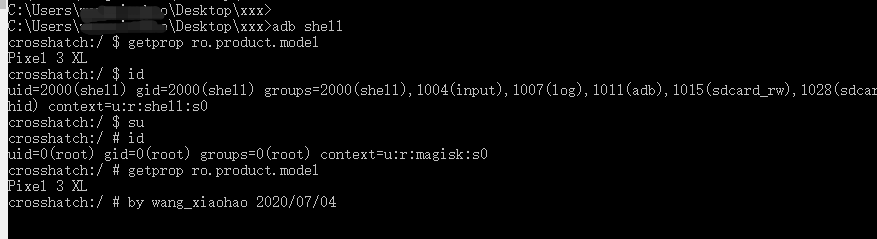
Step 13: Reboot the device. Your Google Pixel 3 XL is successfully rooted.
fastboot reboot
KingoRoot on Windows
KingoRoot Android on Windows has the highest success rate. It supports almost any Android device and version.

KingoRoot for Android
KingoRoot for Android is the most convenient and powerful apk root tool. Root any Android device and version without connecting to PC.

Top Posts
- Successfully Get Root Access On Android 10 (Google Pixle 3 XL) With Magisk
- How to Root Android without Computer (APK ROOT without PC)
- How to Root Android with KingoRoot (PC Version)
- Best Top 5 Root Tools to Safely Gain Root Access for Your Android Devices
- How to Root Your Android 10.0 with Kingoroot root APK and PC root
- How to Root Your Android 5G with Kingoroot root APK and PC root
- How to Root Android 9.0 Pie with Kingoroot Both root APK and PC root Software
- How to Root Android 8.0/8.1 Oreo with KingoRoot APK and Root Software
- How to Root Huawei Packed with EMUI 8 and EMUI 9 or Higher with Magisk
- How to Root Samsung running Android 9.0 Pie with Magisk