How to Enable USB Debugging Mode on Android 5.0 Lollipop
USB Debugging mode enabled is the most critical step in Android rooting process, which can only be done manually by users themselves. The latest Android version, i.e. Android 5.0 (Lollipop), has been released and rolled out to Nexus devices on 12 November, 2014. The Nexus lineups including Nexus 4, Nexus 5, Nexus 7 and Nexus 10 will receive OTA update shortly. And this article shows you how to enable USB Debugging mode on Android 5.0, the Lollipop. Google uses Material Design on Android 5.0 Lollipop, which adds fresh animations and new looks into its UI. However, the steps to enable USB Debugging mode stays the same as earlier Android versions above 4.2.

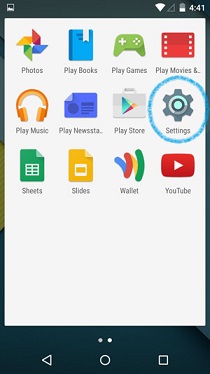
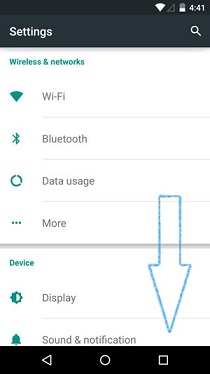
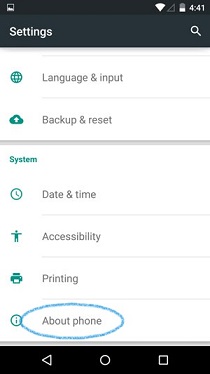
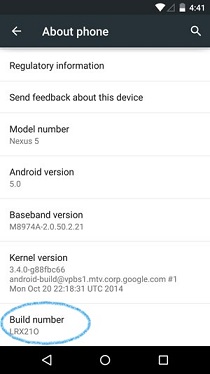
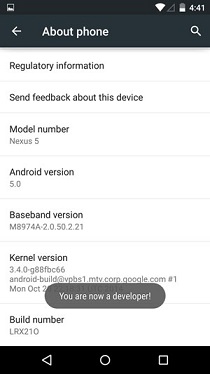
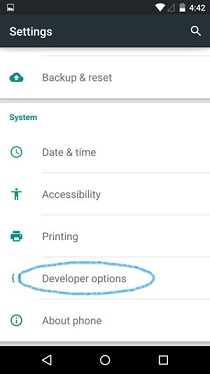
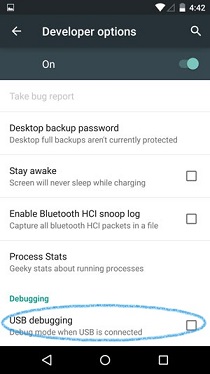
There will be an icon on the top left of your notification bar that suggesting USB Debugging is ON.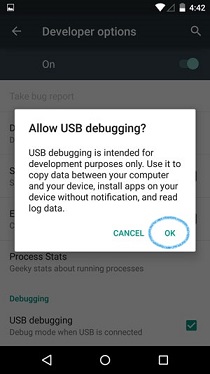
![]()
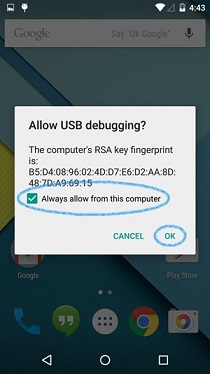
NOTE: When rooting your device with Kingo Android Root, you will need to connect your device to PC and allow USB Debugging mode from that computer. Please tick "Always allow from this computer" to ensure the rooting process with Kingo.
KingoRoot on Windows
KingoRoot Android on Windows has the highest success rate. It supports almost any Android device and version.

KingoRoot for Android
KingoRoot for Android is the most convenient and powerful apk root tool. Root any Android device and version without connecting to PC.

Top Posts
- Successfully Get Root Access On Android 10 (Google Pixle 3 XL) With Magisk
- How to Root Android without Computer (APK ROOT without PC)
- How to Root Android with KingoRoot (PC Version)
- Best Top 5 Root Tools to Safely Gain Root Access for Your Android Devices
- How to Root Your Android 10.0 with Kingoroot root APK and PC root
- How to Root Your Android 5G with Kingoroot root APK and PC root
- How to Root Android 9.0 Pie with Kingoroot Both root APK and PC root Software
- How to Root Android 8.0/8.1 Oreo with KingoRoot APK and Root Software
- How to Root Huawei Packed with EMUI 8 and EMUI 9 or Higher with Magisk
- How to Root Samsung running Android 9.0 Pie with Magisk